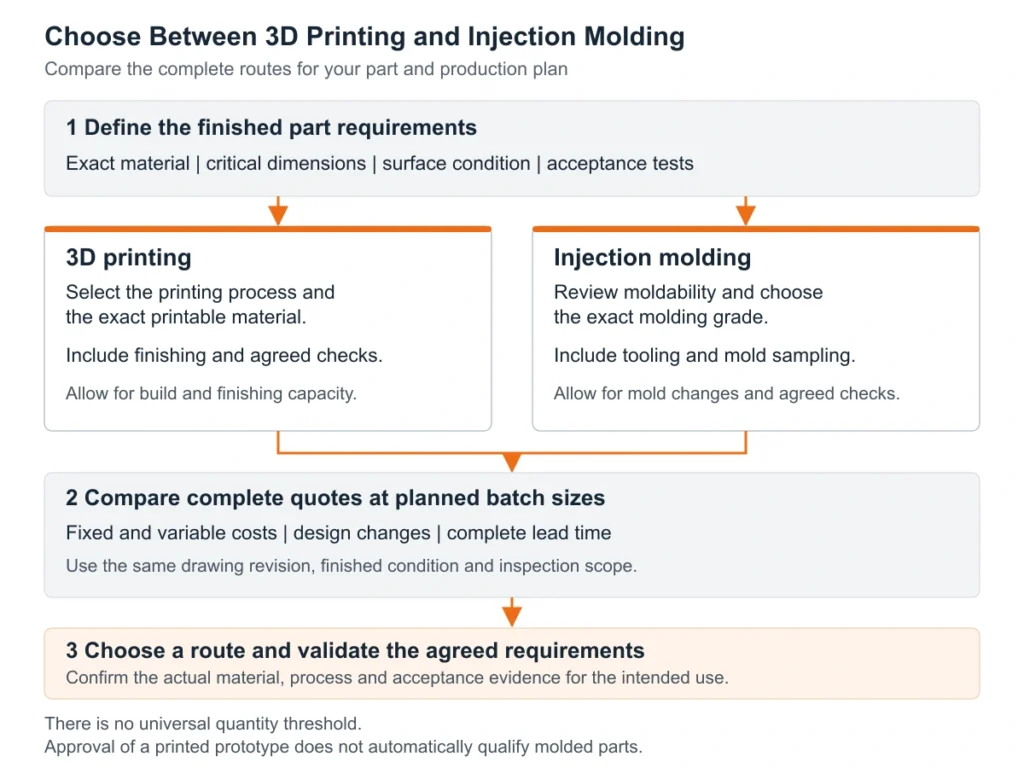
Choose between injection molding and 3D printing by defining what the parts must demonstrate, which material is required and how many accepted parts you expect to order. Printing can avoid committing to a mold while a design changes. Injection molding can become attractive when the geometry is sufficiently stable, a molding grade is required and the expected orders justify tooling. The decision depends on the complete project rather than a universal quantity threshold.
At SAMSHION, we print SLA resin parts and SLS nylon parts in our own factory. This article explains how to compare those printing options with injection molding for plastic prototypes and production planning. It covers material identity, moldability, total cost, delivery scope and the evidence needed before approving a manufacturing route.
Begin with the same drawing revision and acceptance requirements for both quotations. A low price for an unfinished print is difficult to compare with a quotation that includes tooling, finished molded samples and dimensional inspection. Establishing a common scope makes the comparison useful before you commit money or time.
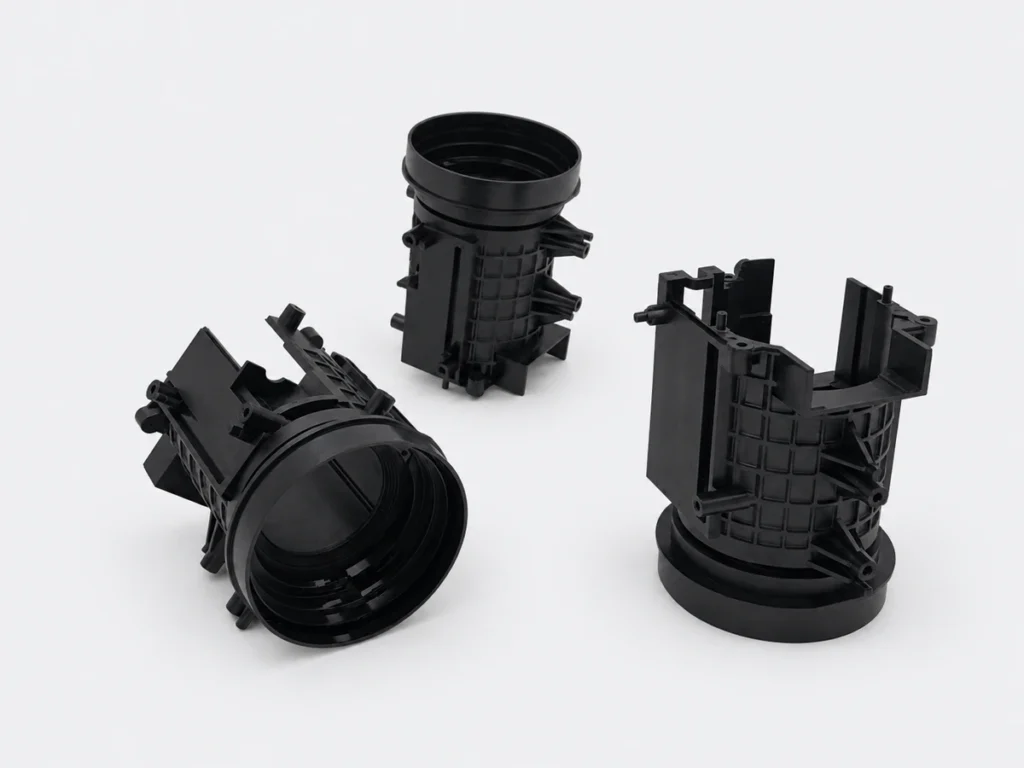
Start with the Purpose of the Parts
A display model, an assembly prototype and a component intended for repeated service can require different manufacturing choices even when they share a CAD model. For an appearance review, the important requirements may be shape, color and visible finish. An assembly review may depend on hole locations, mounting surfaces, clearances and access for fasteners. A functional evaluation may also require temperature, load, chemical exposure or repeated operation to be defined.
Write down which decisions the sample will support. A printed housing can help confirm connector access while leaving the final resin grade or molding behavior unresolved. If the approval depends on the behavior of a specific injection molding material, a printable substitute needs its own justification. The manufacturing process forms part of the test article definition.
Decide whether the requested parts are temporary prototypes, a batch to cover a production gap, or intended final components. Printing can serve each of these purposes when the selected material, process and acceptance evidence are suitable. Injection molding can also support development through appropriate tooling. Quantity alone does not establish either route’s suitability.
Compare the Manufacturing Routes
For this comparison, SLA builds with a photopolymer resin, while SLS builds the nylon parts discussed here from powder. Injection molding forms parts in a mold using the specified molding material. These process differences affect preparation, finishing and design freedom. Our SLA vs SLS prototype guide explains the selection between the two printing routes in more detail.
A process can remove one constraint while introducing another. An enclosed feature that looks straightforward in CAD still needs a way to remove uncured resin or loose powder if printed. The molded version needs a feasible way to create and release the same feature. Review the actual geometry with the supplier rather than assuming either method can produce every internal detail.
Confirm the Actual Material
Resin Prints and Molding Plastics
An SLA material described as ABS-like is a photopolymer formulation, not the same material as injection molded ABS. The distinction is explained in Formlabs material guidance on ABS and ABS-like resin. A similar appearance or one similar datasheet value does not establish equivalent behavior in impact, heat, long exposure or repeated flexing. Identify the property the prototype must demonstrate and check the actual printed material in its completed processing condition.
For printing, record the resin product, any required post-cure and the intended finishing condition. Follow the applicable material finishing instructions for the cleaning and curing route. A coating or paint used to obtain an exhibition finish may also change a contact surface or small clearance, so indicate where that finish is required.
Nylon Prints and Molded Nylon
The word nylon identifies a material family. An SLS nylon part and a molded nylon part can differ in grade, additives, moisture condition and processing history. A successful fit in one condition does not automatically confirm a fit after conditioning or in a different environment. Compare the actual material designations before using either part as evidence for the other route.
For a drawing that specifies a molding grade, ask whether a printed material is acceptable for the current review and which questions remain for molded samples. If a customer requires final-material testing, record that requirement before choosing the prototype process. Color, filler content and required material documentation also belong in the quotation scope.
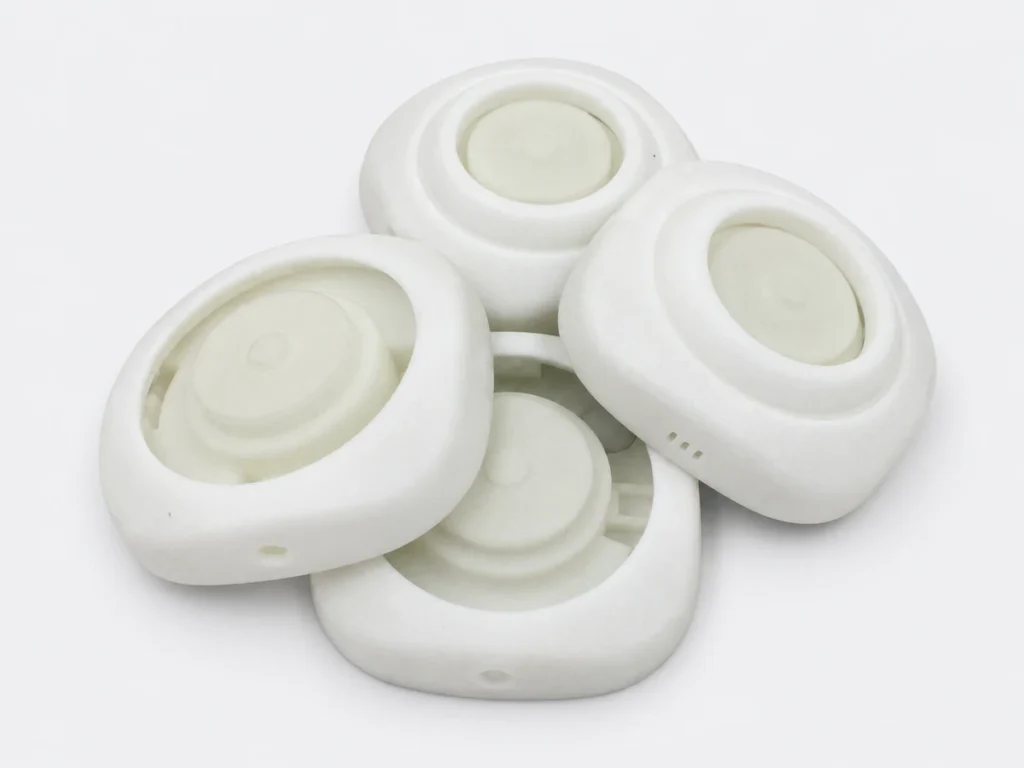
Review the Design Before Ordering a Mold
A printable design may need revision for molding. The review should address wall transitions, draft, ribs, bosses, undercuts, parting lines and possible gate and ejector locations. These features affect how the part fills, cools and releases from the tool. Protolabs guidance on designing parts for injection molding provides a useful starting point for this review; the tool proposal still needs to address the specific component.
Consider a housing with a thick mounting boss beside a thin visible wall. A printed prototype can establish its assembly position, while the molded design may need a different boss or rib arrangement to manage molding behavior. Similarly, a latch that releases from a printing support arrangement may introduce a mold action or a design change in injection molding. These decisions can affect both tool cost and the final component.
Mark cosmetic faces and areas where a gate vestige, ejector mark or parting line would be unacceptable. Review these locations when requesting an injection molding quotation, before the mold is made. An approved printed exterior does not establish the appearance of a molded surface, because the production process introduces different surface features.
Calculate the Complete Cost at Several Quantities
Establish the Same Quotation Scope
For printing, include build preparation, printing, support removal or powder removal, required cleaning and curing, cosmetic finishing, agreed inspection and packing. Depending on the route, build loading and part orientation can change the price. A repeated order may benefit from established preparation, but its price still depends on the quantity and production scope.
For molding, separate tool design and manufacture from sampling, changes and production. Confirm the number of cavities, quoted tool scope, material grade and finishing requirements. Also ask how tool maintenance, storage, ownership and transfer are handled. Include inserts, secondary machining or assembly if the finished part needs them.
Compare costs for the first required batch and plausible repeat orders. Use accepted delivered parts as the basis. Agree how each quotation accounts for production losses, inspection and replacement rather than adding an arbitrary allowance twice. Put freight, taxes and other commercial charges on the same basis or identify them separately.
An Illustrative Cost Comparison
The following figures are invented solely to explain the calculation. They are not SAMSHION prices, industry averages or a production recommendation. Assume printing has a fixed preparation charge of USD 100 and a variable cost of USD 24 per accepted part. Assume molding has a combined tooling, sampling and setup cost of USD 3,100 and a variable cost of USD 4 per accepted part. Each route is assumed technically acceptable and to include the same agreed finishing and inspection scope.
Printed total cost equals 100 plus 24 multiplied by quantity. Molded total cost equals 3,100 plus 4 multiplied by quantity. Equating the two gives a crossover of 150 parts for these assumptions.
Freight, taxes, later design changes and any future tool maintenance are excluded from this simplified example. Real quotations may have quantity tiers, minimum charges or different batch setup costs, so the straight lines may not apply across the whole order range. Calculate with the quoted terms for your project.
Why There Is No Universal Crossover Quantity
Part size, build packing, labor, finish, tool complexity, cavity count and expected tool use can move the cost crossover substantially. A small printed component with efficient build loading has a different cost structure from a large housing. A simple mold has a different initial commitment from a tool requiring several actions.
For an example of how specific the assumptions can be, Formlabs publishes a comparison of printing and molding a mixer latch. Its result belongs to that component, equipment and costing model. Use such studies to identify cost items to compare, then obtain quotations for your own drawing rather than adopting another project’s threshold.
Include Design Changes in the Decision
When hole positions, wall thickness or connector details are still changing, estimate the cost of the next likely revision. A new printed batch usually requires updated preparation and manufacturing. A mold change requires an engineering assessment; some changes can be made to the existing tool, while others require inserts, substantial rework or replacement tooling.
Ask which revision is approved for quoting and which revision is released for manufacture. Record any agreed exceptions on the order. If printed samples are being used to finalize the geometry, establish what must be confirmed before the mold design is released. This reduces the chance that tooling progresses against a version the customer is still changing.
Forecast quantities also need a time horizon. A tool that appears attractive over a large lifetime forecast may be harder to justify for an uncertain first order. Compare the cost of buying the next batch with the cost and risk of committing to future production. A smaller printed batch can be a practical way to resolve an open design decision before that commitment.
Compare Delivery of Accepted Parts
Printing time is only one part of printed-part lead time. Include file review, scheduling, build preparation, printing, cooling where required, cleaning, required curing, finishing and inspection. SLS parts need powder removal; SLA parts need the processing appropriate to their material. Our 3D printing service can be reviewed against the specific part and delivery requirements.
For a new mold, include design approval, tool manufacture, sampling, review and any corrections before the production batch. Ask when the first samples will be available and what follows if a dimension or cosmetic requirement needs adjustment. For a repeat order from an approved existing tool, the sequence and lead time can be quite different.
State whether the required date means samples ready for inspection, parts ready for dispatch or parts delivered to the destination. If an exhibition or assembly trial has a fixed date, define the minimum acceptable sample scope and finish. Compare both routes at that same milestone instead of comparing a print completion date with delivery of inspected molded parts.
Define Dimensions and Surface Acceptance
Identify the features that control assembly: mating diameters, hole locations, mounting faces, slot widths, wall clearance or a particular interface. Put the important dimensions, datums and tolerances on the drawing. A CAD model defines nominal geometry but does not always communicate the acceptance limits or the inspection condition.
For printed parts, orientation, local geometry and finishing can influence the finished dimensions. For molded parts, material shrinkage, cooling, tool design and processing also affect the result. A layer setting is not a finished-part tolerance, and the existence of a mold does not by itself establish a dimensional capability. Agree the requirements and measurement approach for each route.
Define whether cosmetic acceptance concerns color, gloss, visible texture, support contact marks or permitted molding marks. State which faces matter and whether the approved sample establishes an appearance reference. Our guide to clear plastic prototypes discusses additional considerations when transparency is part of the review.
If fit must be checked with mating components, identify who supplies those components and whether assembly checks are included in the order. The prototype assembly checks guide explains information that helps define this work. A dimensional report and a functional test answer different questions; specify both when both are required.
Plan the Transition from Printed Samples to Molded Parts
A printed prototype can resolve geometry and assembly questions before tooling, but the first molded samples still need their agreed review. Protolabs guidance on moving from additive manufacturing to injection molding describes design and material considerations during this transition. Confirm the material designation, drawing revision, critical dimensions and cosmetic condition. Where performance testing is required, define the test method, sample condition and responsible party before approval.
Dimensions can match while behavior differs because the material or process has changed. A latch, for example, may require a separate repeated-use evaluation in the intended molded material. A sealing interface may require testing in the assembled condition. Any regulatory or application approval must address the relevant material, process and finished product requirements.
For a temporary batch while tooling is prepared, identify which requirements the printed parts satisfy and whether they are approved for their intended use. Record the quantity and duration of that approval where relevant. The term bridge production should describe an agreed use, rather than imply automatic interchangeability with the later molded component.
Consider CNC Machining When Stock Material Matters
Some projects need a small quantity in a specified plastic stock material before committing to a mold. CNC machining may provide another route when the geometry can be reached by cutting tools and suitable stock is available. It introduces its own workholding, access and material-condition considerations.
Our CNC plastic machining vs injection molding guide covers that comparison. Consider it when a printable material is unsuitable for the intended evaluation or when a machined interface is central to the sample. Confirm how the stock material relates to the final requirement; machining a polymer does not reproduce every effect of molding it.
Information to Send for a Useful Comparison
Provide enough information for both quotations to address the same requirement:
- The current 3D model and dimensioned drawing with revision identification.
- First-batch quantity, plausible repeat quantities and the expected ordering schedule.
- Required material grade and any acceptable alternatives for the prototype stage.
- The purpose of the parts and the decisions or tests they must support.
- Critical dimensions, fit requirements and the condition in which they will be inspected.
- Cosmetic faces, color, finish and any reference sample.
- Required delivery milestone and destination.
- Agreed dimensional reporting, assembly checks, functional testing and material documentation.
- For molding, tool scope, sampling approval and ownership or maintenance requirements.
Separate mandatory requirements from preferences. For example, a fixed material grade may determine the route, while a cosmetic finish may be adjustable for an internal assembly trial. Clear priorities help resolve a conflict between delivery, cost and the information the sample must provide.
Common Questions About Injection Molding vs 3D Printing
Is 3D Printing Cheaper for Small Batches
It can be, especially when a new mold would otherwise be required. Compare the complete printing quotation with the tooling and production quotation at the required quantities. Large part volume, extensive finishing or an already available mold can change the result.
How Many Parts Justify an Injection Mold
There is no single number. Use the project quotations, expected repeat orders and likely design changes. First confirm that both routes meet the same material and acceptance requirements, then compare their total costs at several realistic quantities.
Can Printed Parts Be Used as Final Components
Yes, when the specified printed material, manufacturing route and finished part meet the application requirements. Define service conditions and required validation. A part’s successful use as a visual prototype alone does not establish its suitability for repeated service.
Can the Same CAD Model Be Used for Both Processes
It can be a starting point, but review the geometry for each process. Build access and cleaning matter for printing; wall design, draft, parting and release matter for molding. Confirm any changes in the released drawing before manufacture.
Are SLS Nylon Parts Equivalent to Molded Nylon Parts
Equivalence depends on the actual grade, processing condition, geometry and required performance. Compare material data under relevant conditions and validate the finished parts as required. Sharing the nylon name does not establish interchangeability.
When Should Printed Prototypes Be Replaced by Molded Samples
Move to molded samples when the next decision requires evidence from the intended molding material and process, or when the approved design and order plan justify tooling. Some development work can continue with prints while molded samples address the remaining production questions.
Send your drawing revision, material requirements, quantities and intended use through our project quotation page. We can review the printed-part requirements and discuss the information needed to compare the next manufacturing route.